Contributing to Modded
Part 1: A simple introduction to getting off the ground
Part 1: A simple introduction to getting off the ground
In this article our aim is to submit textures to the modded repositories. To do this we must first use a client to create a local copy of the repository we are interested in submitting to. Once we have a local working copy we can add, remove, and fix textures in it from our computer. From there the goal is to get the textures re-uploaded so others can comment and hopefully add them to the modded downloads.
To do this an understanding of the GitHub system is a must. We have modded repositories that are hosted on github.com. This platform allows us to easily manage large amounts of contributions and multiple people working on the same thing. Each repository is dedicated to a single Minecraft version. Inside each repository is a huge list of folders. Each mod is separated into its own folder for the sake of organization. This simple step allows for our modded patcher system, and custom packs to be made. This also creates an organization scheme to the repository. These repositories are the center of the system.
In order to contribute to the modded repositories a GitHub account is needed. It is free, and can be created by visiting this link. Once a GitHub account is created we can move on to setting up our client. The client is what will act as an interface from our local computer to the files stored on the GitHub servers.
In this tutorial we will be using the GitHub for Windows client. The steps should be similar for most operating systems. After we have the client downloaded, and logged in with your respective GitHub account, it is time to get the textures from the modded repository.
To get the textures we need to get a copy of the official Soartex one. This notion is call “forking” a repository. The idea is that you can create a copy of the repository for yourself to make changes and edits to. After you are done making your edits to your own copy you can finally submit those edits to the official Soartex repository.
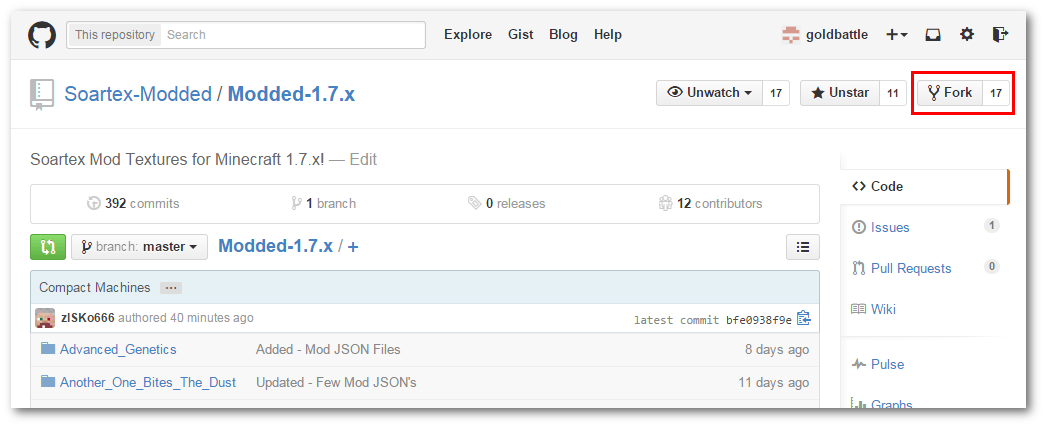
For this example I will be forking the Soartex-Modded/Modded-1.7.x repository. On the Github website there should be a fork button at the top right corner of the repository page. This will fork this official repository to your local account.
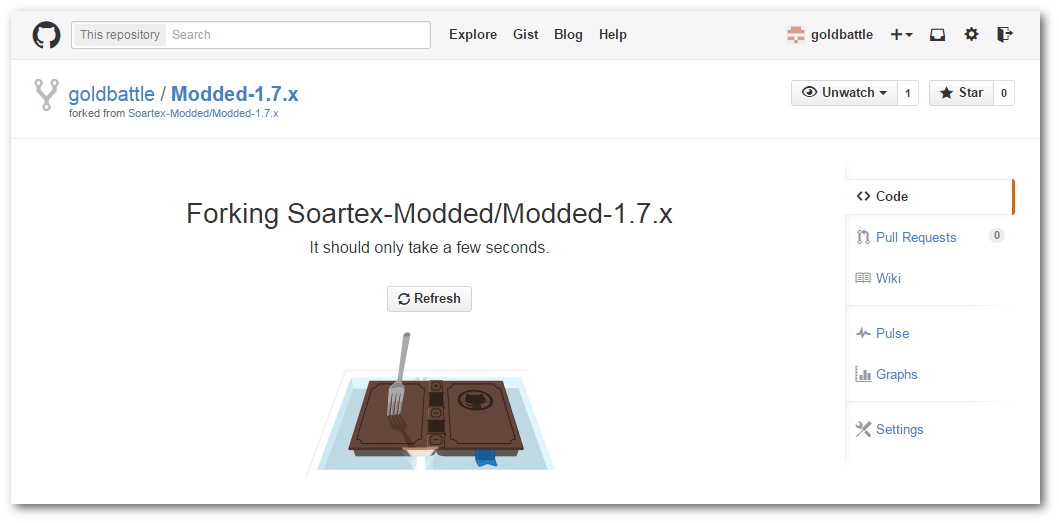
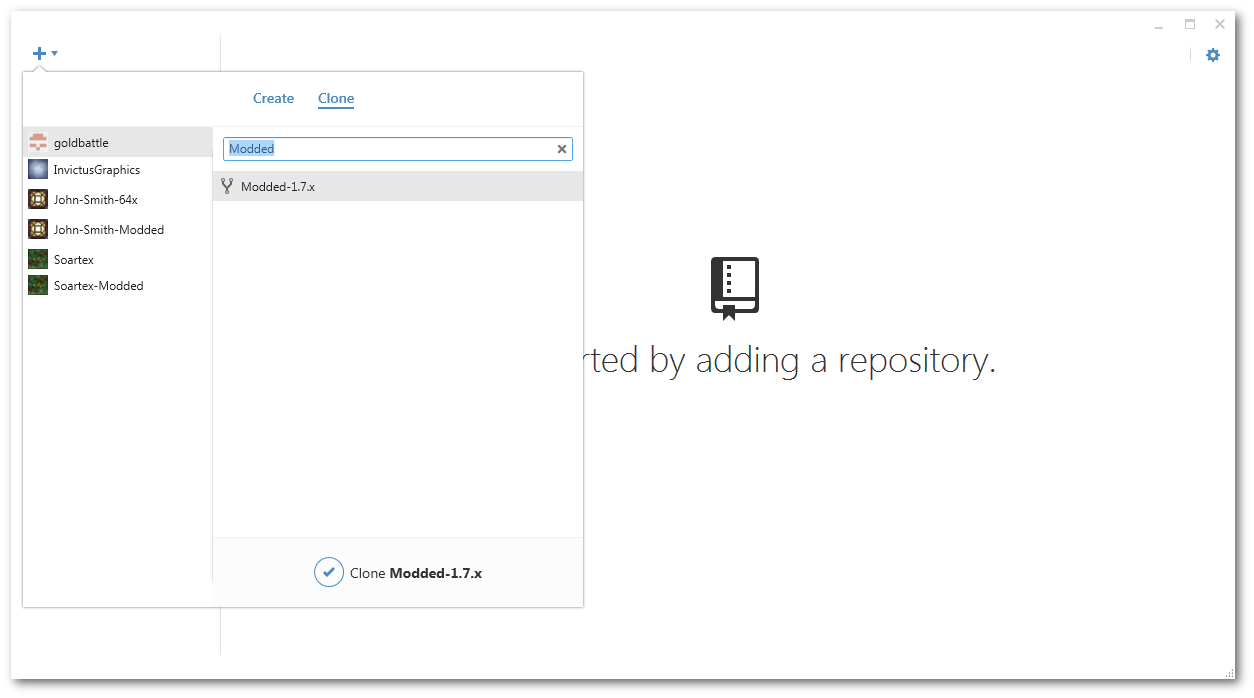
Now that there is a copy on your local account we can download it, and edit the textures through our client. We first want to make a copy of the repository to our computer. This is called “cloning” the repository. In the Github client, the plus dropdown will let you get access to the repositories on your account. From the clone tab/menu the repository we forked should show up. By clicking the clone button the repository will be downloaded to your computer.
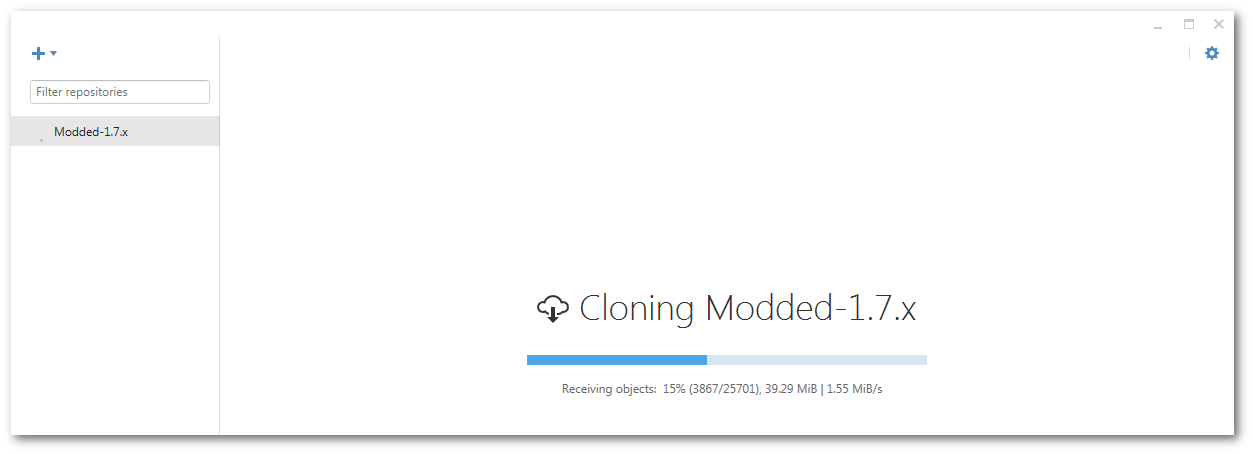
In git, the software that powers the GitHub client and repositories there is the idea of branches. Branches are independent lines of edits. We ask when submitting textures create a new branch for each mod. To create a new branch click on the branch button which is probably labeled “master” at the moment. Create a new branch by typing a new name such as mod-ic2-additions. After you create the branch you can use this menu to switch between each branch.

Warning: It is important to note that when adding textures to your local folder that you do so with the correct branch selected. As show below the client shows that we are now in on the mod-ic2-additions branch, and not the master one.

Once a specific branch has been created for the textures that you want to submit it is easy to add the files. Browse to where the repository is stored on the disk. For me it is ~/My Documents/Github/. In the respected repository folder, in my case /Modded-1.7.x/, you should see the exact folder structure from the GitHub site. You can find/create the respective mod folder and add your texture.
When adding textures to a mod, copy only specific files from that mod into its respective folder. Each folder should have only the textures relating to that mod. The folder naming convention for the root folders is the name of the mod with underscores for spaces. Also note when adding a new mod, please include the mod.json file.
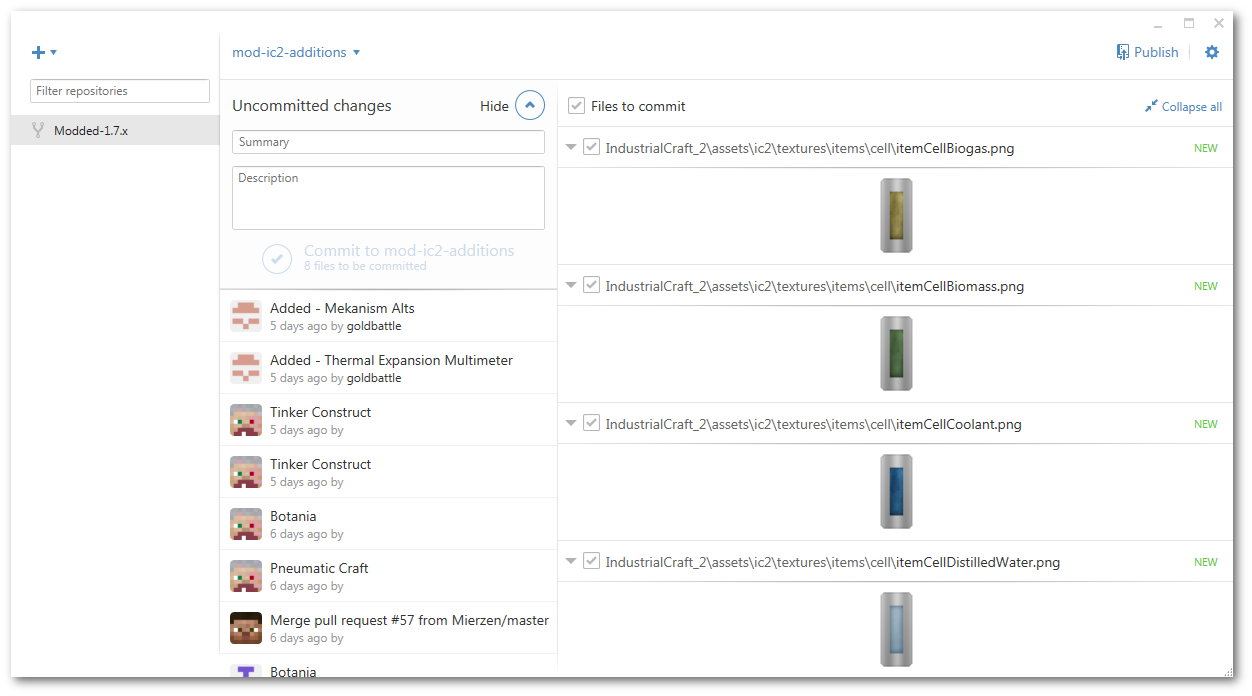
Once you have edited, added, or removed the textures for the mod, it is time to record the changes made. This is called “committing”. You create a record that records exactly what files where changed or removed. This is called a “commit”. To create a commit, head back to the GitHub client. In this client it should sync and show you that there are “Uncommitted Changes”. When this information is expanded your respected changed should be seen on the right panel.
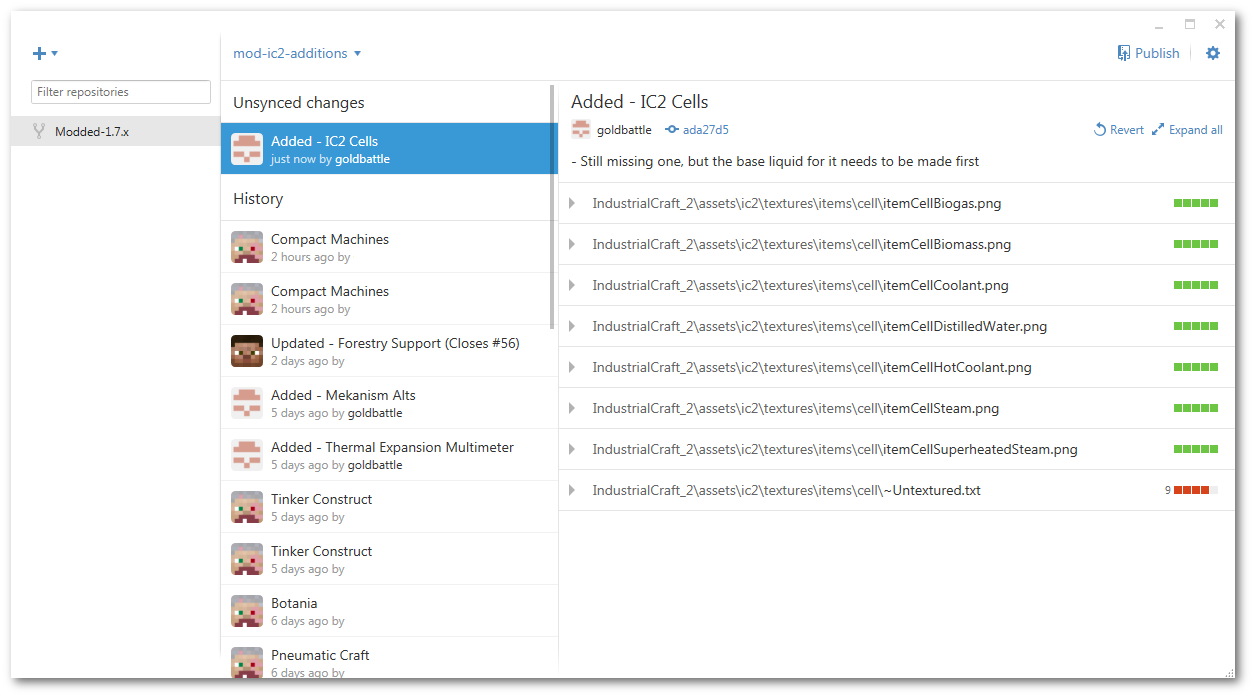
Once the changes have been committed it is time to sync them with the repository on Github. To do this click the “publish” or “sync” button in the top right. In our case we have publish because we just created a new branch, so it is going to “publish” that branch by creating it on the GitHub site’s repository. After the initial commit is created, this button changes to “sync” as you are syncing your local commits with the ones on GitHub.
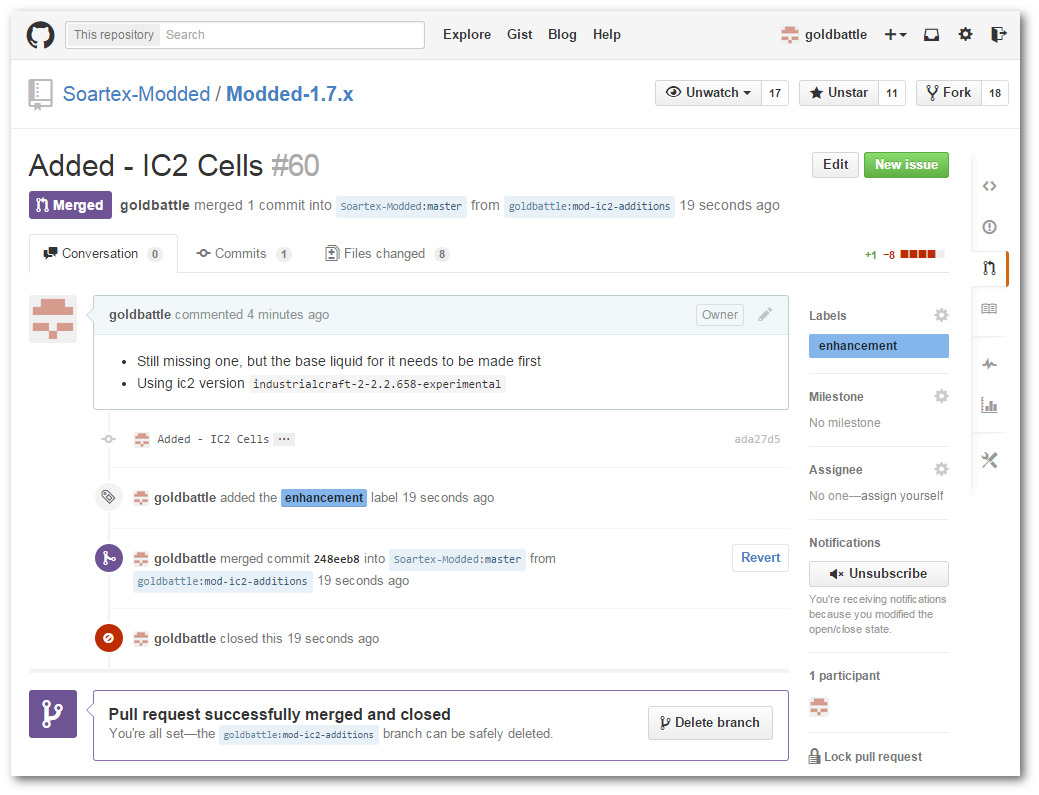
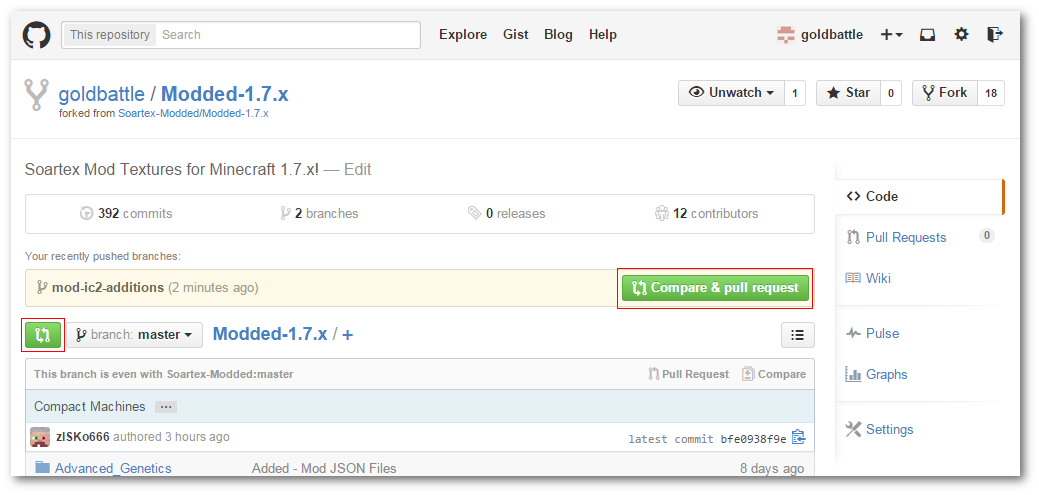
A pull request is what allows for the textures on your repository to be brought back to the main Soartex repositories. To create a pull request visit your copy of the repository on github.com. From there you can either click the pull request button next to the branch selection dropdown, or GitHub usually has a convenient popup. At the next menu you can select what branch you want to submit as a pull request to the main repo. In this example below I needed to change it with the edit button from my goldbattle:master branch to the one I created goldbattle:mod-ic2-additions. I can now fill in some information about what mod I tested it against and details that might be helpful.
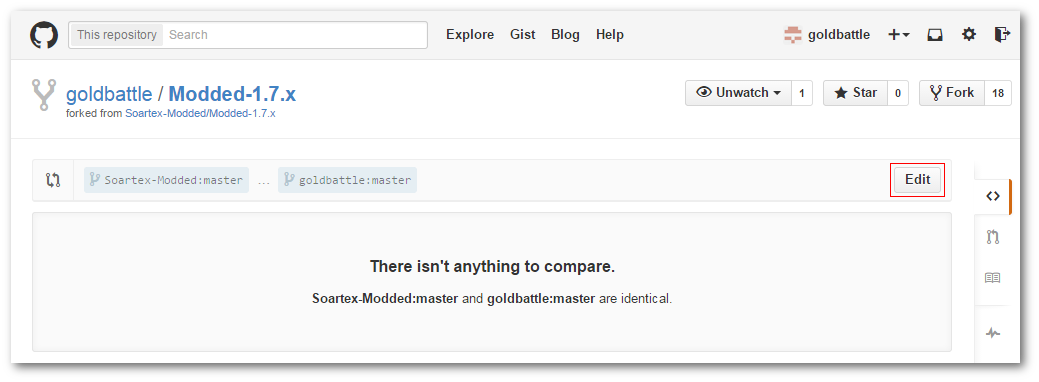
Information: It is important that the correct branch is selected. As seen in the below picture, I am submitting my edited textures for Industrialcraft 2. I can see the commits that I added below, and I am on the correct branch goldbattle:mod-ic2-additions.
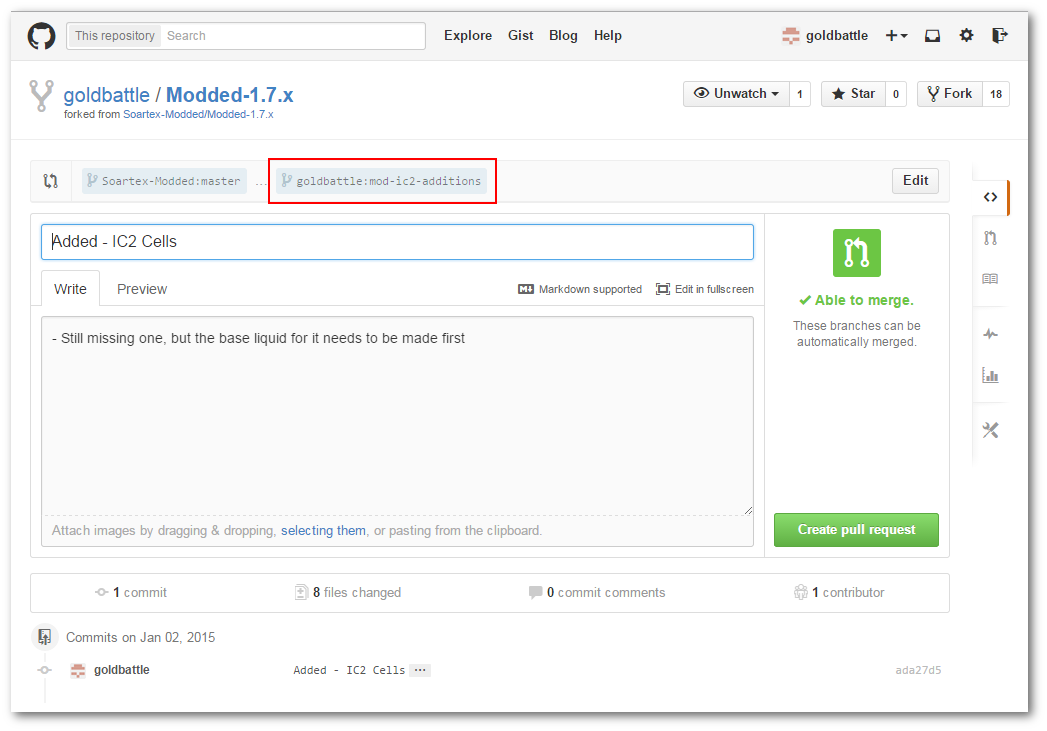
Once you have submitted your commits, it is time to wait to get them reviewed. Contributors to the repository will test your textures and make sure they are good to be pulled to the repo. Once they have been reviewed they will get added to the repo. This is called “merging”. If changes or improvements are requested then, simple commit those edits to the same branch. In my case I could ensure that my mod-ic2-additions branch is selected in my client, make my changes, and then create a new commit. The additional commits will automatically show up on the pull request. Once it is merged the issue is will be closed and if you wish you can delete your branch.
